
Understanding Booth Types and Uses
Phone booths and work pods have become increasingly popular in modern environments, offering versatile solutions for privacy and productivity. Understanding the various types and their specific applications is essential for selecting the right fit for different spaces and needs.
Main Types of Booths and Pods
- Phone Booths These compact, soundproof enclosures are typically designed for phone calls or video conferences. They are often used in coworking spaces, offices, and public areas to provide a quiet refuge from surrounding noise. Most phone booths are single-person units, ensuring privacy while maximising space efficiency.
- Work Pods Work pods are larger than phone booths and cater to individual work or small collaborative sessions. They offer a quiet place for focused tasks and may include built-in desks, seating, and power outlets. Some advanced designs even feature climate control and improved acoustics for extended use.
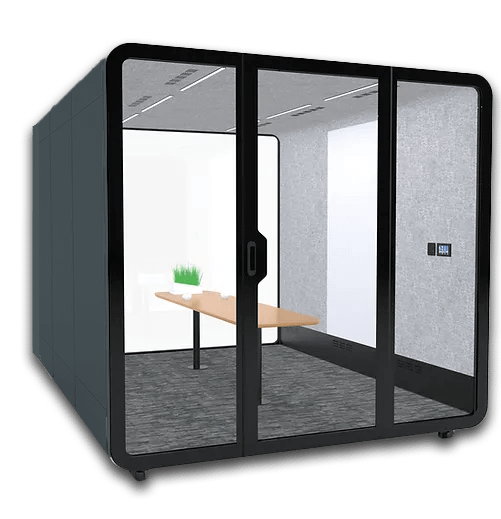
- Meeting Pods Designed for small groups, meeting pods can accommodate anywhere from two to six people. These pods are ideal for brainstorming sessions, team discussions, or casual meetings. High-quality soundproofing ensures that conversations remain private, even in bustling environments.
Common Uses of Booths and Pods
- Corporate Offices: These structures provide private spaces for employees to take calls, attend virtual meetings, or perform deep-focus work.
- Coworking Spaces: Shared work environments benefit from phone booths and work pods by allowing individuals to retreat to quieter corners without disrupting others.
- Public Areas and Libraries: These units are often installed to offer users a calm spot amid hectic settings for reading, studying, or telecommunicating.
- Retail and Hospitality: Some businesses utilise pods as specialised consultation spaces or customer service hubs, blending practicality with style.
By tailoring booth and pod choices to the intended use case, businesses and organisations can create functional, adaptable environments suitable for today’s flexible work habits.
Planning Your Booth Assembly
Before beginning the assembly process, proper planning is essential to ensure efficiency and minimise potential issues. Start by reviewing the instruction manual provided with the phone booth or work pod. Familiarise yourself with the components, tools required, and step-by-step instructions. Gathering this information beforehand helps in understanding the assembly flow and identifying any preparatory tasks.
Choose a location that is suitable for the size and purpose of the booth or pod. Ensure the selected space allows for ample clearance around the structure for assembly and later use. Measure both the area and the booth dimensions to confirm compatibility. Additionally, check for features such as electrical outlets or ventilation requirements that may influence placement.
Organise the materials by unpacking all the components and laying them out in a safe, spacious area. Inspect each part to confirm that nothing is damaged or missing. It may also be helpful to categorise and group similar parts together to streamline the process. Collect all the required tools, which may include screwdrivers, wrenches, or power drills, as specified in the manual.
Consider assessing the floor condition where the assembly will take place. A level surface is critical to ensure structural stability. If necessary, opt for anti-slip pads or other levelling solutions to counter unevenness. Clear the workspace of clutter or obstacles that could hinder movement or cause hazards during the build.
Plan the assembly timeline, keeping in mind the complexity of the task and the assistance required. It’s recommended to have at least one additional person to help, especially for handling larger or heavier components. Proper planning minimises delays, reduces assembly errors, and ensures a smooth setup experience.
Gathering the Necessary Tools and Materials
Assembling phone booths and work pods requires proper preparation to ensure the process is efficient and smooth. Before beginning, it is crucial to gather the essential tools and materials needed for assembly.
Tools Needed for Assembly
- Screwdriver Set: A combination of Phillips and flat-head screwdrivers is typically required. Consider a power screwdriver for added convenience.
- Allen Keys: Often included in the assembly kit, these are essential for tightening specific screws or bolts.
- Tape Measure: Needed for confirming precise dimensions or ensuring alignment within the intended space.
- Rubber Mallet: Useful for gently adjusting panels or fittings without causing damage.
- Spirit Level: Ensures the booth or pod is aligned and level, especially on uneven surfaces.
- Cordless Drill: Helpful for drilling pilot holes or securing screws in hard-to-reach places.
- Utility Knife: Necessary for cutting open packaging or cords.
Core Materials
- Assembly Kit: Most phone booths or work pods come with a pre-packed assembly kit including screws, bolts, and corner brackets.
- Panels and Frames: These form the structural components and may include pre-drilled holes for easy alignment.
- Instruction Manual: A detailed guide provided by the manufacturer containing step-by-step instructions.
- Acoustic Panels: Often included to improve sound insulation and reduce external noise intrusion.
- Rubber Seals and Gaskets: Used to create airtight and noise-proof closures around doors and panels.
Additional Items to Prepare
- Protective Gear: Gloves and safety glasses are recommended to minimise risks during assembly.
- Adhesives (if required): Some designs may require wood glue or silicone for improved stability.
- Drop Cloth or Mat: Protects the floor from scratches or accidental damage during the build.
Organising these tools and materials beforehand saves time and eliminates disruptions during assembly. Moreover, having the right tools ensures a sturdy and professional finish for the phone booth or work pod.
Step-by-Step Pre-Assembly Preparation
Preparing thoroughly before beginning the assembly process ensures efficiency and prevents potential missteps. Follow these outlined steps to set up appropriately.
1. Review the Instruction Manual
It is imperative to carefully read the provided assembly manual to understand the components, tools required, and assembly sequence. Familiarise yourself with terminology, diagrams, and safety guidelines to minimise errors.
2. Clear and Organise the Workspace
Choose a spacious, clutter-free area with sufficient lighting where parts can be laid out. Compare the size of the phone booth or work pod to the available space to confirm there is adequate room for assembly. Avoid uneven surfaces that can cause instability during the process.
3. Conduct a Parts Inventory
Unpack all components from the packaging and check them against the parts list in the instruction manual. Ensure all panels, screws, fixtures, and any pre-assembled sections are present and undamaged. Missing or damaged pieces should be reported to the supplier immediately.
4. Gather Required Tools
Most assembly kits provide a list of tools needed, which might include screwdrivers, drills, mallets, or hex keys. Ensure all necessary tools are available and in proper working condition to avoid delays during assembly.
5. Arrange Parts Logically
Lay all components out in an organised manner, grouping related items together. Place smaller items such as screws and bolts in labelled trays or containers for easy access. Avoid mixing components to prevent confusion later.
6. Protect the Materials
Place foam, blankets, or soft covers under large panels or frames to prevent scratches during assembly. Handle fragile parts with care to avoid accidental damage before use.
7. Ensure Proper Safety Measures
Wear safety gloves, goggles, or other equipment appropriate for handling tools and heavy materials. Keep children and pets away from the assembly area to maintain a safe environment.
Completing these steps attentively will streamline the setup and contribute to a successful assembly.
Assembling the Booth Frame
Constructing the booth frame is a straightforward process requiring attention to detail and proper tools. Begin by identifying the individual frame sections provided in the package. These sections are typically labelled, making it easier to sort and organise them before assembly. Ensure the area where the frame will be assembled is clean and spacious to avoid unnecessary interruptions and ensure safe handling.
Next, gather the essential tools for the process. These commonly include a screwdriver, wrench, level, and, if required, a rubber mallet for secure joint connections. With all tools in hand, start by positioning the base frame. The base is the foundation of the structure, so ensure it is levelled correctly to guarantee stability. Use a level tool to verify accuracy. If adjustments are required, consider using the levelling feet provided with the booth to stabilise uneven surfaces.
Once the base frame is secure, proceed with connecting the vertical frame sections. These sections typically slot into designated grooves or are attached using bolts. Align them carefully, ensuring the connections are snug but not overtightened. Tightening bolts too hard may damage the frame or compromise its alignment. After securing the vertical sections, check the alignment using a level tool to maintain uniformity.
The final step involves attaching the top frame horizontally to complete the structure. Similar to the vertical sections, alignment and secure connections are imperative. Double-check all fitting points for tightness and stability. The top frame also provides additional strength to the structure. Verifying its attachment ensures the booth’s durability, especially if external panels or accessories are later added. With the frame fully assembled, inspect it for any loose points or misalignments before proceeding to the next stage.
Setting Up Shelves, Counters, and Support Structures
Installing shelves, counters, and support structures inside phone booths or work pods is a crucial step to maximise functionality and ensure durability. Proper alignment and secure fittings are key to creating stable surfaces that withstand regular use. Begin by identifying the pre-drilled holes and mounting points specified in the assembly instructions, as these indicate where each shelf or counter should be positioned.
Steps for Installation:
- Prepare the Components: Lay out all the shelves, brackets, and screws provided in the kit. Check for any manufacturing defects or missing pieces before proceeding to avoid interruptions during assembly.
- Attach the Brackets: Secure the mounting brackets onto the designated areas with screws. Ensure they are flush against the wall panels to prevent instability. Tighten the screws only slightly at first, allowing adjustments for alignment.
- Position the Shelves or Counters: Carefully align the shelf or counter with the installed brackets. Slide the unit into place, ensuring it sits evenly on all supporting points. Some kits may have locking mechanisms that need to be engaged to hold the structure securely.
- Secure into Place: With the shelves or counters correctly positioned, fasten the screws tightly into the brackets. Use a spirit level to confirm that the surface is horizontal and make adjustments, if necessary, before final tightening.
Tips for Stability and Functionality:
- Use a screwdriver or drill with a torque-limiting feature to avoid overtightening screws, which could damage materials.
- Test the load-bearing capacity of each structure by applying gentle pressure. If wobbly, re-check alignment and tighten screws.
- For additional support, consider using adhesive pads or anti-slip strips on brackets and shelves.
Taking these measures ensures a dependable setup while maintaining a sleek appearance.
Creating an Attractive Panel and Branding Setup
When assembling phone booths and work pods, the visual appeal plays a crucial role in ensuring the units blend seamlessly with the surrounding workspace while reflecting the company’s identity. Structuring the panels and branding elements thoughtfully can make the pods functional yet eye-catching.
Selecting Panels for Durability and Design
Choose high-quality materials for the panels that balance durability and aesthetics. Panels should not only withstand regular usage but complement the overall workspace design. Common options include acoustic panels to minimise noise levels and textured or sleek finishes for a modern look. Ensure the colours align with the company’s branding palette, as well as the mood you wish to evoke—neutral colours for a calming effect or bold shades for energy.
Incorporating Branding Elements
Brand integration within phone booths and work pods enhances recognition and creates a cohesive environment. Consider applying the company logo onto external surfaces, using decals or printed panels for a polished touch. Interior branding can include motivational quotes, thematic colours, or subtle patterns derived from the brand design. Positioning these elements strategically on panels ensures they remain visible without overwhelming users.
Ensuring Optimal Placement and Functionality
Panels should be set up to maximise both privacy and accessibility. Use clear or frosted glass components thoughtfully to add privacy without blocking natural light. The booth’s door panel should have an easy-to-use mechanism to ensure smooth entry and exit. If branding includes lighting features, ensure they are integrated without compromising functionality, such as soft LED accents that highlight your logo or panel outlines.
Tips for Unifying Appearance
To maintain a harmonised style, focus on consistent textures and branding details across all pods in the workspace. Complement the panels with cohesive accessories, such as matching chairs or wall hooks. Small touches like branded acoustic cushions or uniform finishes will align the booth design with your broader workplace aesthetic.

Final Touches: Decor, Accessibility, and Functionality
Once the structural assembly of phone booths or work pods is complete, attention should be paid to enhancing their aesthetic appeal, ensuring accessibility, and optimising functionality. These last steps are crucial to create a space that’s not only visually pleasing but also practical and comfortable for use.
Enhancing Decor
Adding decorative elements can transform the assembled booth into a welcoming and inspiring space. Consider integrating colours and textures that align with the room’s broader design scheme. Acoustic panels, artwork, or patterned wallpaper can add visual interest while maintaining soundproofing. Incorporating lightweight furnishings, such as compact shelves, makes organising easy without compromising on space. Soft lighting, such as LED strips or dimmable lamps, should be installed to ensure a comfortable working atmosphere. Additionally, using furniture with ergonomic designs contributes both style and comfort.
Ensuring Accessibility
Accessibility must be prioritised so that your phone booth or work pod accommodates diverse user needs. Factors such as the width of the door and its ease of operation are vital—opt for sliding doors or doors with handles designed for smooth usage. If the pod is meant for wheelchair users, ensure it meets standard accessibility guidelines, including an entrance wide enough for mobility aids and sufficient clearance space inside. The inclusion of adjustable desks or chairs allows for maximum adaptability.
Optimising Functionality
Functionality is key to how effectively users can utilise the pod. Investing in adequate ventilation is essential for airflow within small spaces without excess noise. Charging ports, USB connections, or wireless charging stations should be integrated for ease of use. Proper cable management solutions minimise clutter and ensure safety. Adding soundproofing materials enhances privacy, while hooks or small compartments improve storage options for personal belongings.
By focusing on these final touches, phone booths and work pods are ready to offer an inviting and efficient private space.
Looking to transform your workspace with high-quality pods or booths? Visit our pod’s page to get started.
About FLYDESK
FLYDESK is an innovative hybrid work management software that helps businesses improve productivity, optimize workspace usage, and enhance team collaboration. Designed for companies embracing flexible work models, FLYDESK streamlines remote work and office coordination, making it easier to manage teams and resources. Discover how FLYDESK can transform your hybrid workplace and boost operational efficiency. Contact us today to learn more!
